Pelco MR5000 Manuale Utente
Navigare online o scaricare Manuale Utente per Telecamere di sicurezza Pelco MR5000. Pelco MR5000 User's Manual Manuale Utente
- Pagina / 16
- Indice
- SEGNALIBRI
- ICS-DO111ABK 1
- Integrated Camera 1
- Important Safety Instructions 2
- Regulatory Notices 3
- Description 4
- Installation 5
- 6 C2495M-A (1/06) 6
- C2495M-A (1/06) 7 7
- Install Camera 8
- Proper camera orientation: 9
- Install Dome and Trim Ring 10
- AUTO IRIS LEVEL ADJUSTMENT 11
- AUTO IRIS 11
- NOT USED 12
- Switch Number and Position 13
- REVISION HISTORY 15
Sommario
INSTALLATIONICS-DO111ABKIntegrated Camera SystemMR5000 Series Public Viewing SystemC2495M-A (1/06)
10 C2495M-A (1/06) Install Dome and Trim Ring 1. Align the screw holes in the trim ring with those in the Camclosure base. 2. Domes with Liners (only
C2495M-A (1/06) 11 AUTO IRIS LEVEL ADJUSTMENT If you have a varifocal lens or fixed focal length lens with an auto iris, you can adjust the level sett
12 C2495M-A (1/06) SWITCH SETTINGS FOR FIXED FOCAL LENGTH LENS WITH AUTO IRIS Refer to the switch drawing. The switch is located next to the lens. Au
C2495M-A (1/06) 13 SWITCH SETTINGS FOR VARIFOCAL LENS The high resolution camera with varifocal lens and auto iris is configured at the factory for au
14 C2495M-A (1/06) Specifications General Operating Temperature -50° to 122°F (-46° to 50°C)De-ices to 25°F (-4°C)Cable Entry 3/4-inch (1.91 cm) condu
PRODUCT WARRANTY AND RETURN INFORMATION WARRANTY Pelco will repair or replace, without charge, any merchandise proved defective in material or workma
United States|Canada|United Kingdom|The Netherlands|Singapore|Spain|Scandinavia|France|Middle East Worldwide Headquarters3500 Pelco WayClovis, Califo
2 C2495M-A (1/06) Important Safety Instructions 1. Read these instructions.2. Keep these instructions.3. Heed all warnings.4. Follow all instructions
C2495M-A (1/06) 3 Regulatory Notices This device complies with Part 15 of the FCC Rules. Operation is subject to the following two conditions: (1) th
4 C2495M-A (1/06) Description Designed specifically for the MR5000 Series public viewing system, the ICS-DO111ABK integrated camera system packages a
C2495M-A (1/06) 5 Installation PREPARE VIDEO AND ELECTRICAL CABLING 1. Temporarily remove the bottom end cap of the MR5000 Series mount if the end ca
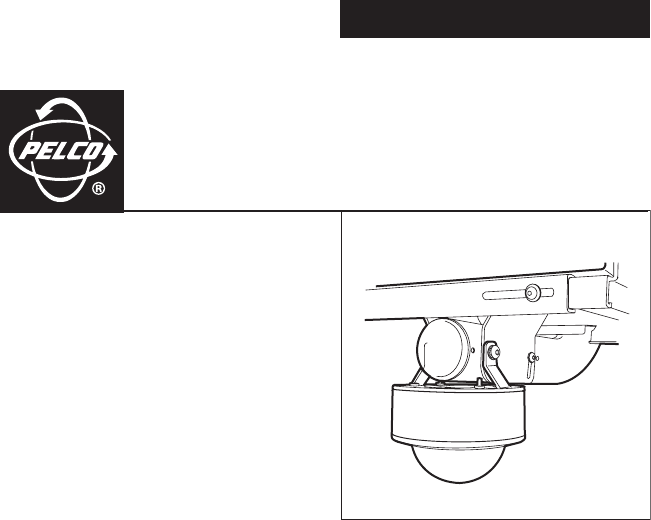
6 C2495M-A (1/06) INSTALL THE ICS-DO111ABK TO THE MR5000 MOUNT Follow the steps below to install the ICS-DO111ABK to the MR5000 mount:1. Align the ad
C2495M-A (1/06) 7 3. Do the following to install the back box inside the cover of the ICS-DO111ABK:a. Feed the video cable and power wires attached t
8 C2495M-A (1/06) Install Camera 1. Some indoor installations do not require a heater. If the installation does not require a heater, remove the heat
C2495M-A (1/06) 9 5. Always make sure the tab on the camera bracket is pointing out of the enclosure (away from the ceiling or wall). Gently squeeze
Prodotti e manuali riguardandi Telecamere di sicurezza Pelco MR5000
 (20 pagine)
 (24 pagine)
© 2020, manymanuals.it. Tutti i diritti riservati | 0.050 s |
 Manymanuals.com
 Manymanuals.de
 Manymanuals.fr
 Manymanuals.it
 Manymanuals.pl
 Manymanuals.cz
 Manymanuals.es
 Manymanuals-pt.com
Commenti su questo manuale